Annual Performance Report for GEAR UP
Annual Performance Report for the Gaining Early Awareness for Undergraduate Programs
ED-2022-SCC-0016-0003_attachment_2_bb comments NJ response CLEAN
Annual Performance Report for GEAR UP
OMB: 1840-0777
GAINING EARLY AWARENESS AND READINESS
FOR UNDERGRADUATE PROGRAMS (GEAR UP)
Annual Performance Report
Website User’s Guide
U.S. Department of Education
Office of Postsecondary Education

Version 1.0
Last Updated: November 2021
This guide corresponds with the approved Annual Performance Report OMB No. 1840-0777, Expires TBD.
Table of Contents
GEAR UP APR QUICK SHEET
This page provides a quick overview of the GEAR UP Annual Performance Report system and how to use it. We recommend you review the entire User Guide to learn more about how each part of the system works so you can fully understand the GEAR UP annual performance reporting process.
Log in to https://gearup.ed.gov with your username and password
See Chapter III of this user guide for more details about logging into the system.
Verify your institution and grantee contact information and update it, if necessary
See Chapter VI for more about the Grantee Profile section.
Complete all Sections of your Annual Performance Report
See Chapters VII-XII for more details about each Section of the report.
Review, Certify, and Submit your Annual Performance Report
See Chapter XIII for more information about these steps.
For complete details about this entire process, please read this User Guide and the Blank APR Form, both of which are available online at https://gearup.ed.gov/help.
The APR is used by the U.S. Department of Education to determine if grantees are making substantial progress in achieving the goals and objectives of the project, as outlined in the approved application and required by the Education Department General Administrative Regulations (§75.253). Continued funding for your project is contingent upon making substantial progress. The APR consists of a cover page and six sections. Grantees must provide data for the Reporting Period and the Budget Period.
Sections I, II, IV, V and VI address the implementation of activities and services for the reporting period described below.
Type of Grant |
Grant Year |
Reporting Period |
Continuing Grantees |
Years 2 through 6 or 7 |
Previous academic school year |
New Grantees |
Year 1 |
Start date to March 31, 2022 |
Section III addresses the federal and matching expenditures and fiscal management of funds for the budget period. The budget period for continuing grantees and new grantees is from the beginning to the end of the last grant performance period. Block 6 of the grant award notification for your new or continuation award outlines the budget period. Grantees must address actual and anticipated expenditures and carryover funds.
Actual Expenditures |
Anticipated Expenditures |
Carryover Funds |
From start date of budget period to March 31, 2022 |
From April 1, 2022 to the end of the budget period |
Anticipated funds that will be carried over to the next budget period |
The APR must be submitted through the web-based system.
Every time you access the system you must accept the terms of the following disclaimer.
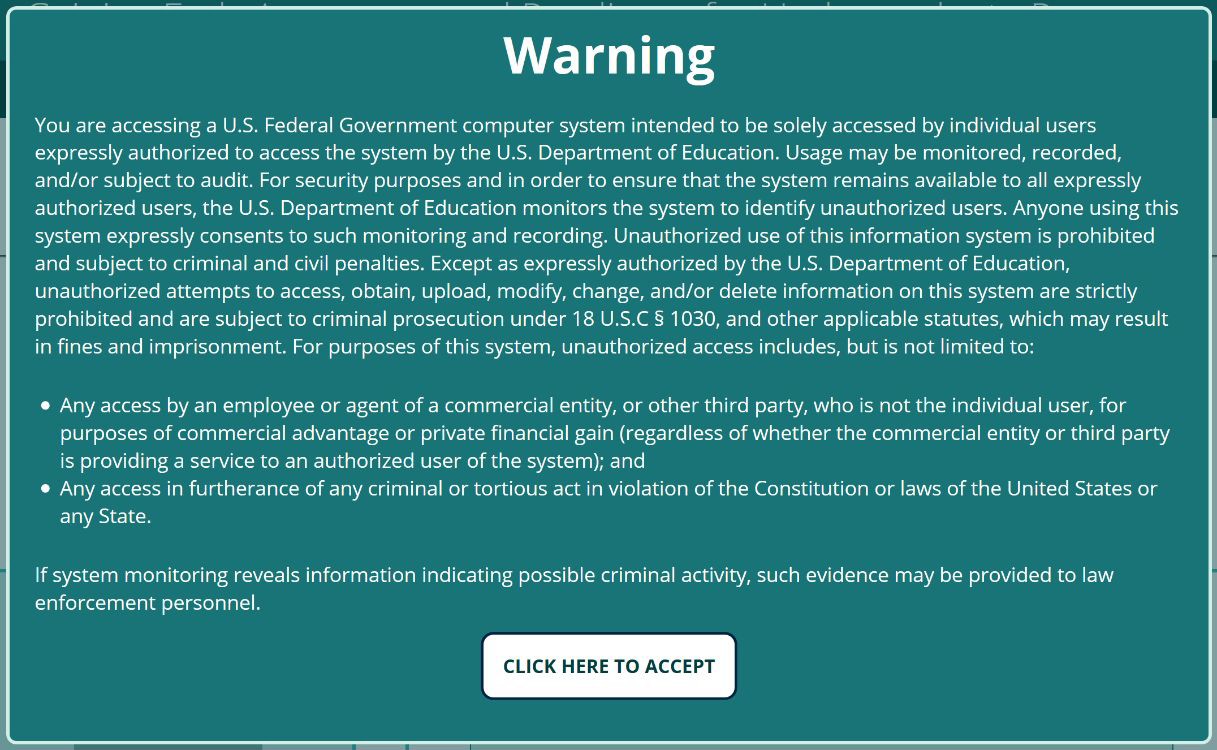
If you don’t accept the terms on the disclaimer screen, you may not use the system.
Browser Compatibility and Security Requirements
Recommended browsers for this website include:
Chrome version 41 and newer
Firefox version 44 and newer
Safari version 10 and newer
Internet Explorer 11 on Windows 10
Microsoft Edge
Please be aware that versions of Internet Explorer less than 11 (IE 10, IE 9, etc.), and versions of Windows less than 10 (Windows 8.1, Windows 7, Windows Vista) are no longer supported by Microsoft. This means they are no longer receiving security patches, bug fixes, or updates.
If you are running software that is no longer supported by its manufacturer, you must upgrade to a supported version or switch to a supported browser.
Security requirements dictate that users may only access the GEAR UP website while using supported software.
After accepting the disclaimer, you will be able to access the GEAR UP system home page.
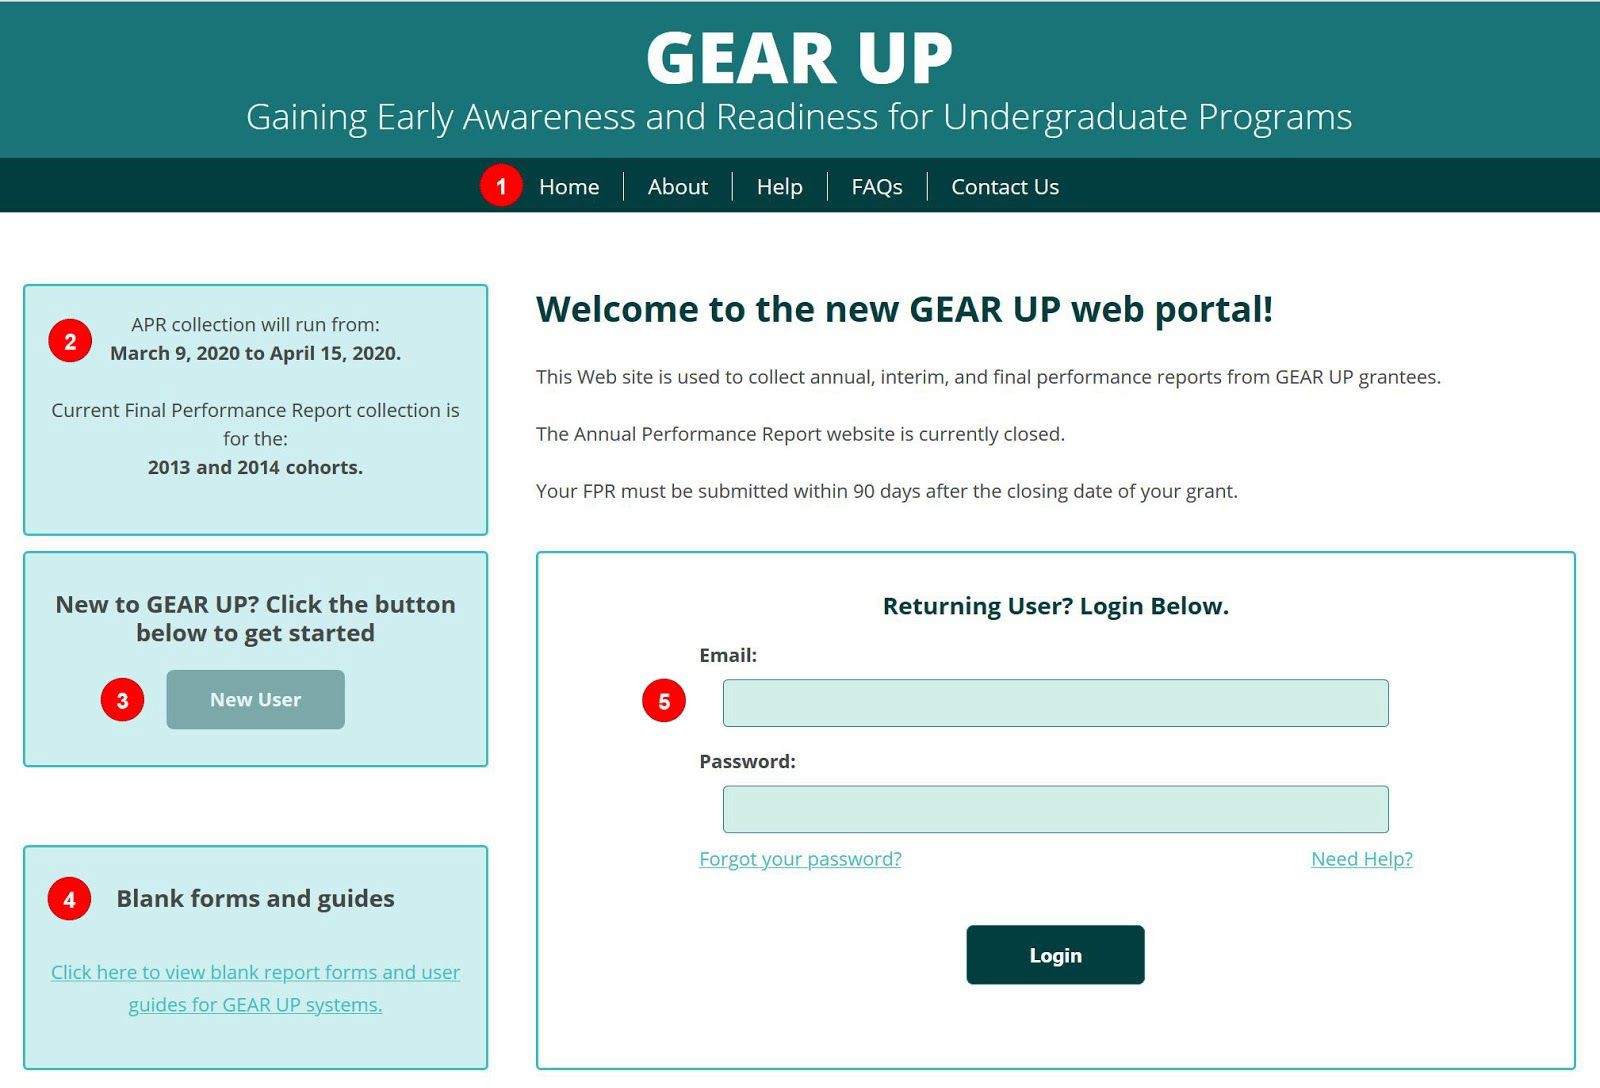
Main Menu Links:
Home - return to the GEAR UP home page
About - learn more about the GEAR UP website.
Help - access User Guides, blank forms, and other helpful resources
FAQs - review answers to frequently asked questions
Contact Us - fill out a contact form to request assistance from the Help Desk (staffed Mon-Fri, 9 am-5 pm Eastern time; telephone support is not available)
System Information - look here for important information about when the GEAR UP system is opening and closing.
New User - click here if you need to request a new user account
Blank forms and guides - another link to the Help page described above
Login fields:
Email - your username is your email address
Password - do not share your password with anyone; if you need additional users to fill out your APR they must have their own accounts linked to their own email addresses
Forgot your password - click here to request a link via email to reset your password
Need help - another link to the Contact Us page described above
Login - after entering your username and password, click this button to login
If you need a new user account, click the New User button and enter your email address into the field provided. The system will check to see if your email is already registered.
If your email address is not in the system, you’ll be presented with a form to request a new user account. Make sure you provide the new user’s:
First Name
Last Name
Email Address,
Institution Name, and
Grant PR Number
The Help Desk must verify that the new user is authorized to access the application by contacting an individual that is currently in the system from a previous year.
Please allow up to one business day for new accounts to be created.
To save a step and expedite this process, you may choose to have someone who is already listed on the grant, such as the Project Director, fill out the new account request form on behalf of the new user.
All Federal websites are now required to include TWO-FACTOR AUTHENTICATION in the login process. You may have seen this on other websites, especially those for banks and credit card companies.
Two-factor authentication requires that you login first with something you know (i.e., your username and password), and then with something you have (e.g., your phone).
You’ll have the option to authenticate to the GEAR UP web portal by means of:
a smartphone app,
a text message, or
a voice telephone call.
You’ll authenticate by confirming a request in the app, or by entering a 6-digit code onto the website sent to you by text or by voice.
The smartphone app is the recommended option, but we realize not everyone will have the access or the desire to use an app.
No matter which method you choose, the website will walk you through the setup process step by step. Setting it up will take less than five minutes, and using it each time you login will take only a few seconds.
Once you are logged in and authenticated you will see your GEAR UP Dashboard.

The dashboard lists all the grants you have permission to access. For some users this will be one grant, for others it may be more than one. If you are listed as the Project Director, Additional Contact/Data Entry Person, or Certifying Official on a grant, it will appear on your dashboard.
The main menu has two additional links now that you’re logged in:
Account - click here to change your password and manage your two-factor authentication method(s)
Logout - click here to end your user session and logout of the system
For each of your grants, the dashboard will display the PR Number, Report Type (APR, FPR, or Interim) and the Status of each report.
Click the appropriate GO button to enter the system and access that grant’s report.
If a report is Not Started or In Progress you will be taken to the data entry forms for that report.
If a report is Submitted, you will be taken to the Submit tab. If the system is still open, you can request that your report be unsubmitted so that you can edit the information and resubmit.
The Welcome page provides information about completing the grant and system requirements.
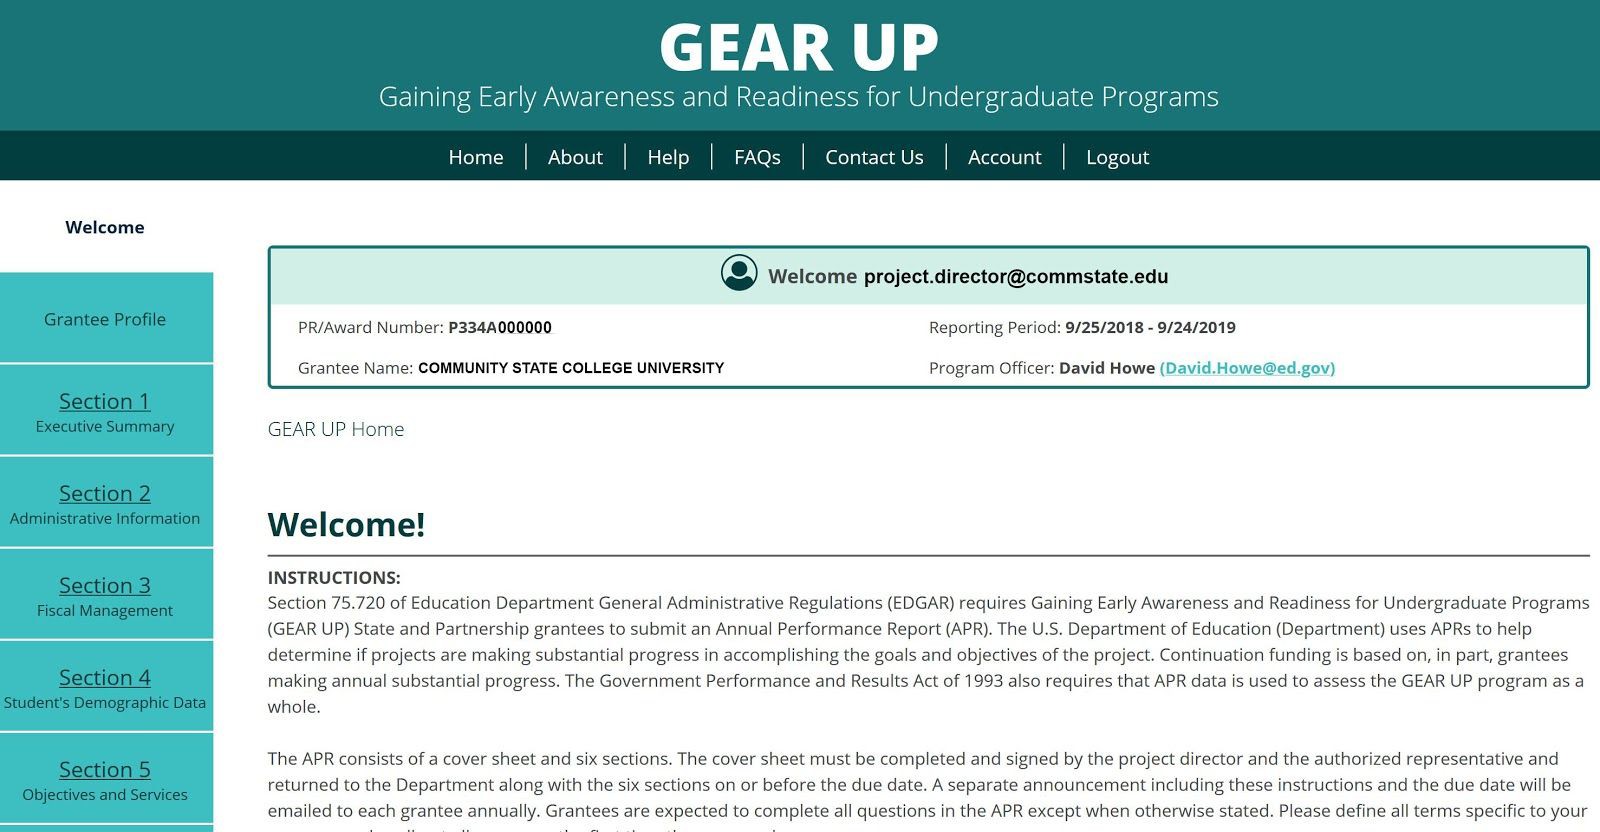
Please make note of the following changes in the new system:
Grantees are no longer required to upload a signed certification form. There is now a section where the Certifying Official is able to electronically sign the document.
Grantees are no longer required to upload a Word template for Sections I and II. Those sections have been converted into standard online data entry forms.
Grantees are expected to complete all questions in all sections of the report except where noted. Questions that are not required will be marked Optional at the beginning of the question.
The Grantee Profile provides information about the grant recipient.
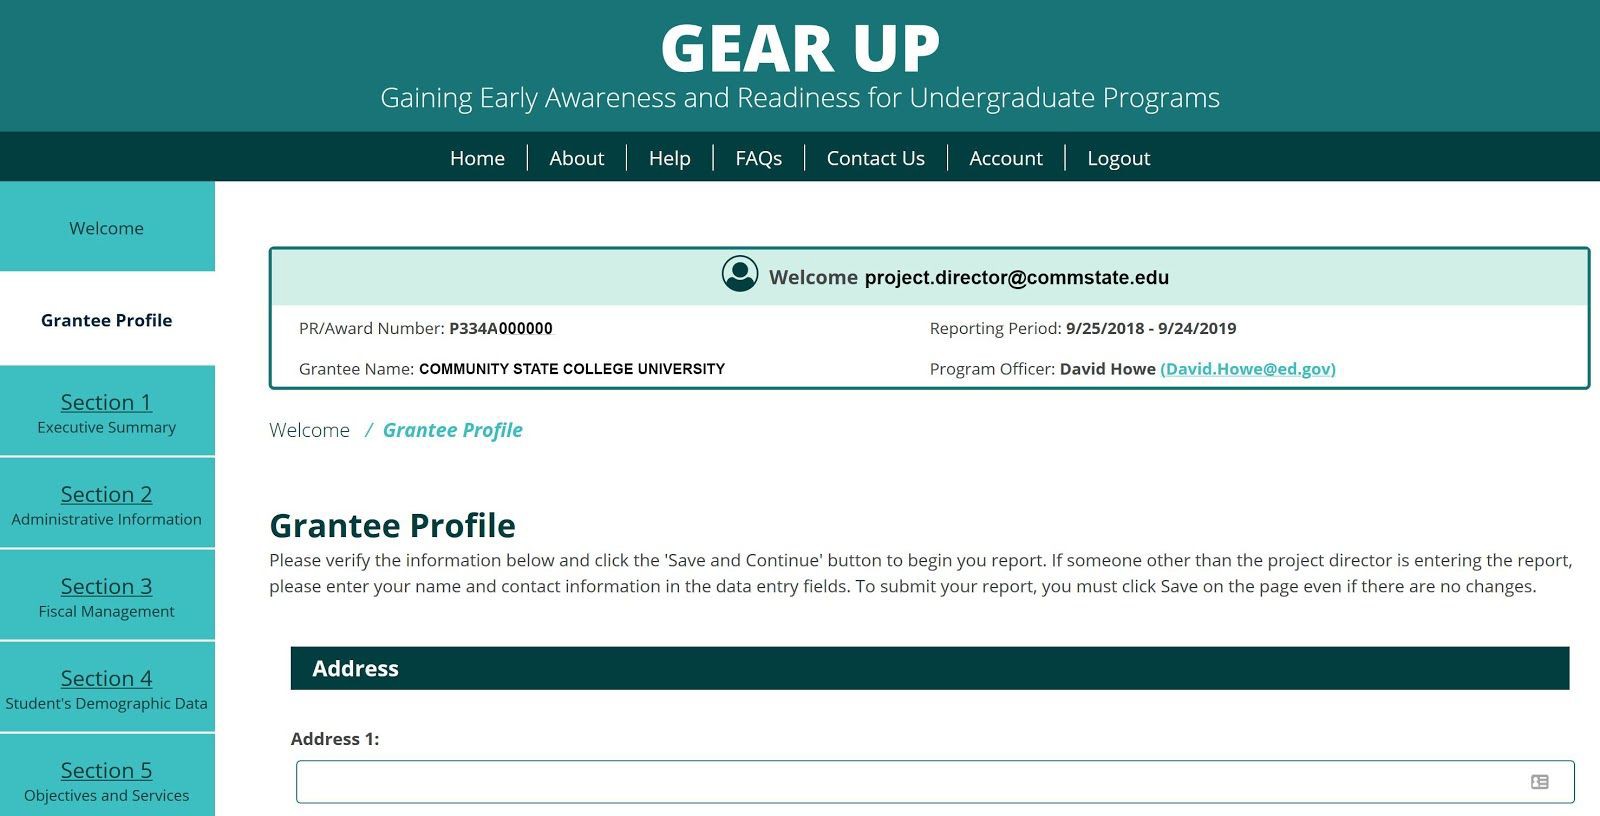
This form will be pre-populated with information from your account. Please review and update the information as necessary.
The Executive Summary requires grantees to provide a brief description of the project’s overall accomplishments, highlighting major outcomes, successes, and challenges.
All questions in this section are required and must be answered by all grantees.
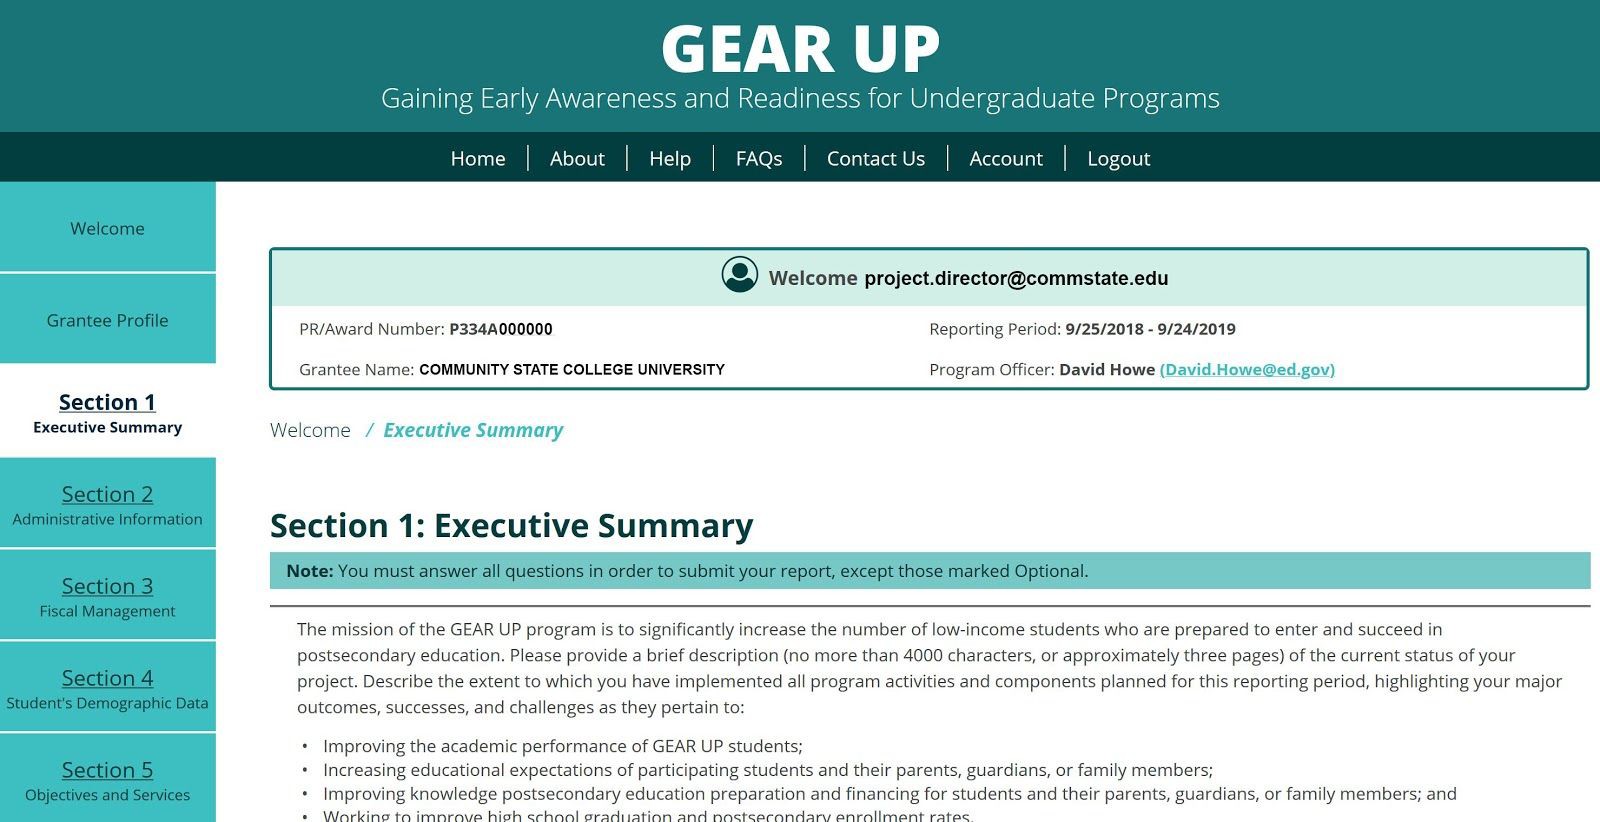
Formerly, Section I was entered into a downloadable Word template and then uploaded into the system.
Now, Section I is entered into data entry form fields just like the rest of the APR.
Please note that the data entry fields do not accept any special formatting characters, such as bold, underline, or italics. They also will not accept tables, charts, graphs, or images.
If you are used to creating your Executive Summary in Word, you may continue to do so, but we would recommend before cutting and pasting it into the system, try cutting and pasting it into Notepad first to see how the formatting will be affected.
The Narrative section allows grantees to provide data on project successes and areas of greatest impact; barriers or challenges; progress towards meeting proposed objectives; lessons learned; effect of the project on participants’ academic achievement and/or performance; and sustainability of activities and outcomes.
All questions in this section are required and must be answered by all grantees.

Formerly, Section II was entered into a downloadable Word template and then uploaded into the system.
Now, Section II is entered into data entry form fields just like the rest of the APR.
Section II, Question 4: Personnel
In question 4 you will be asked to create a list of the names and titles of all key personnel. To get started, click the Add Personnel button.
![]()
Then enter your data into all the fields as displayed below.
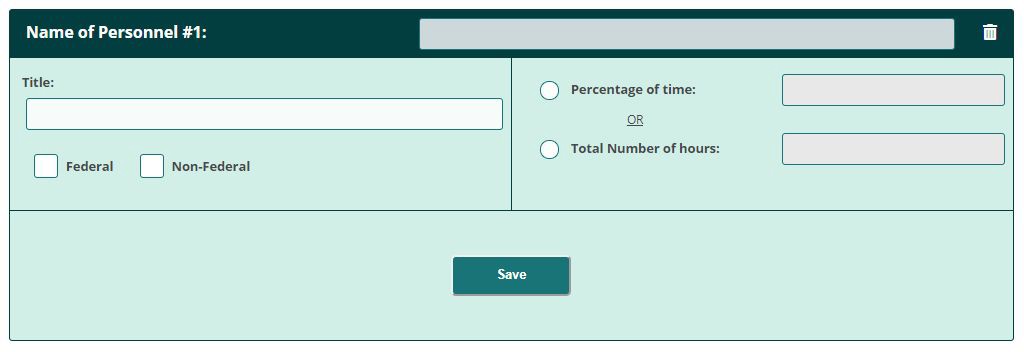
Click Save when done.
To add another person, click the Add Personnel button again, and repeat until you’ve created all the records you need.
To delete an entry, simply click the Trash Can icon in the upper right corner of that item’s header bar at any time. Be careful, because there is no undelete feature. If you delete an item you didn’t mean to, you will have to re-enter the data from scratch.
Section II, Question 6: Partners
In question 6 you will be asked to create a list of partners, both original and those added during implementation. To get started, click the Add a Partner button.

Then enter your data into all the fields as displayed below.

Click Save when done.
To add another School, click the Add a Partner button again, and repeat until you’ve created records for all necessary partners.
To delete an entry, simply click the Trash Can icon in the upper right corner of that item’s header bar at any time. Be careful, because there is no undelete feature. If you delete an item you didn’t mean to, you will have to re-enter the data from scratch.
Grant Administration Information requires grantees to provide data on changes in project design; changes in partners; and details about scholarship components, if applicable.
All questions in this section are required and must be answered by all grantees EXCEPT the following:
Section 3, Question 4: First Year grantees do not have to answer, and will not see this question
Section 3, Question 6d: This question is optional for all grantees

a. Section III, Question 6c: Organizations
In question 6c you will be asked to create a list of Organizations where scholarship funds are being held pending distribution to former GEAR UP students. To get started, click the Add an Organization button.
![]()
Then click the Organization header bar to expand the panel so you can enter your data.
![]()
Then enter your data into all the fields as displayed below.
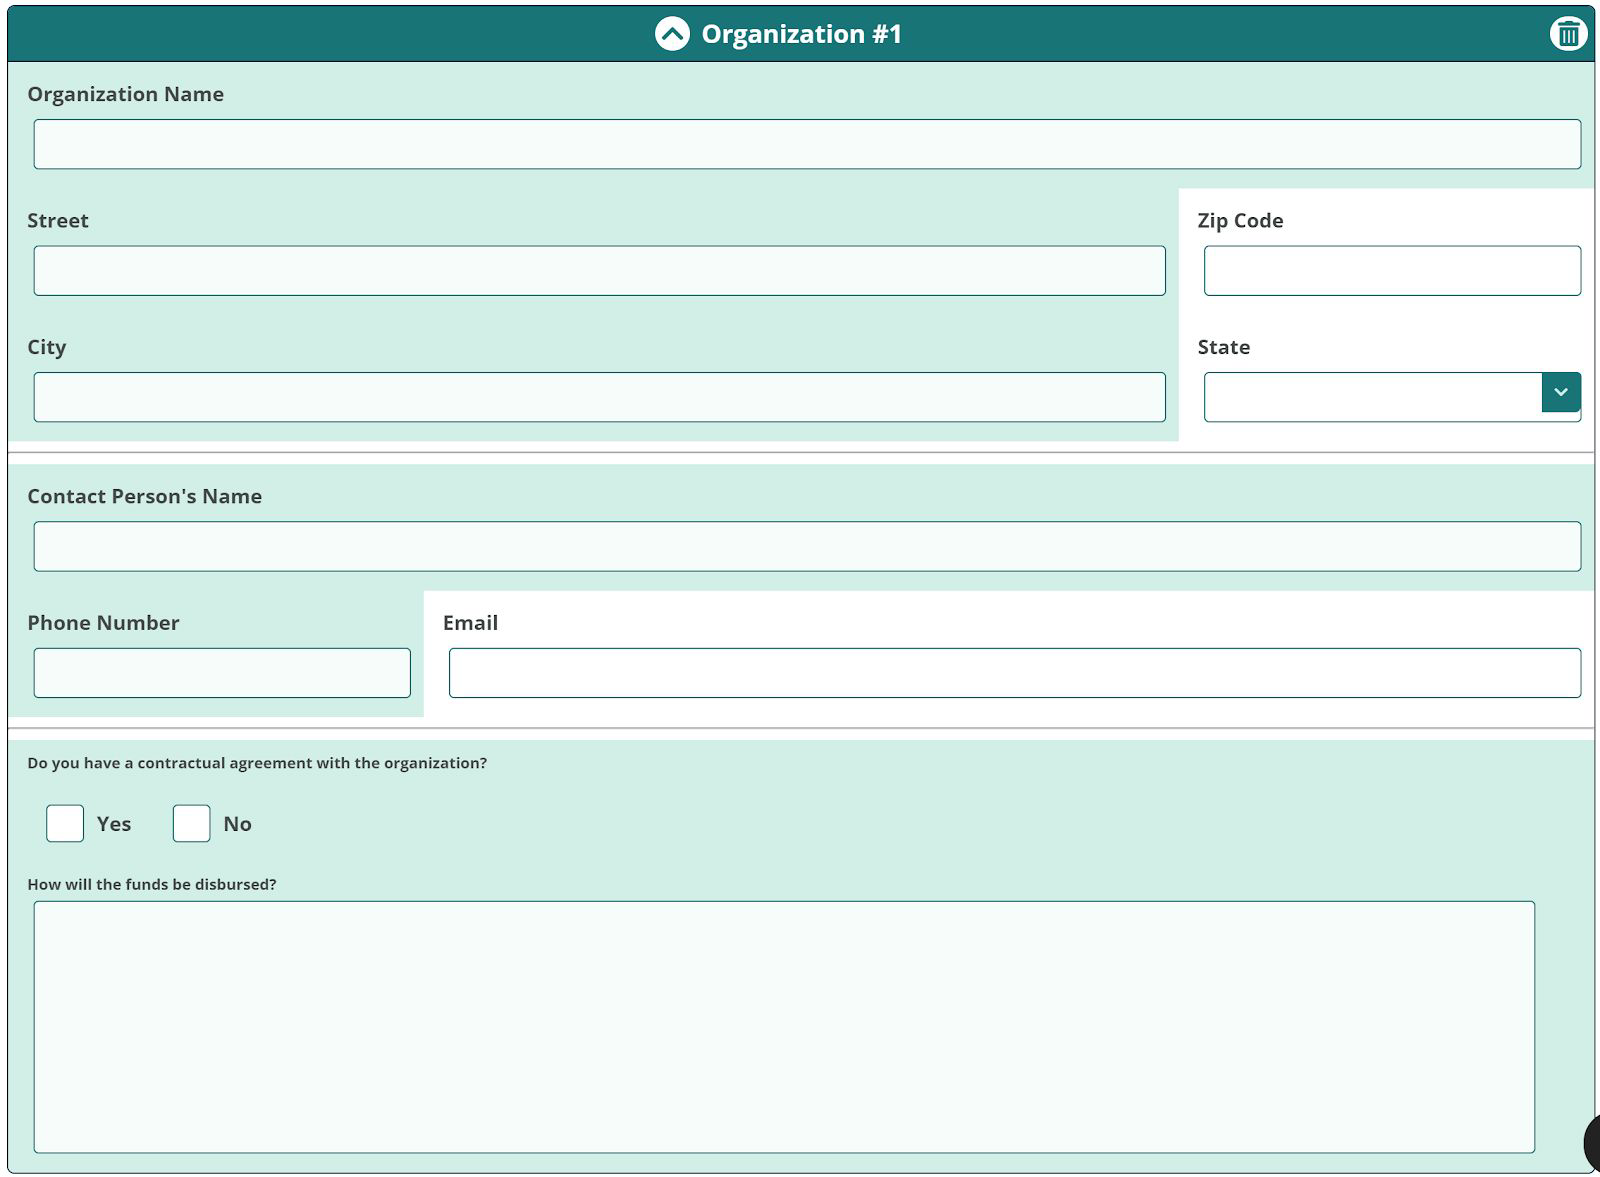
To add another Organization, click the Add an Organization button again, and repeat until you’ve created records for all necessary organizations.
You can click any Organization header bar at any time to collapse it and get it out of your way, or to expand it so you can see the data inside it. The header bar is where it says “Organization #1” or #2, etc.
To delete an organization, simply click the Trash Can icon in the upper right corner of that organization’s header bar at any time. Be careful, because there is no undelete feature. If you delete an organization you didn’t mean to, you will have to re-enter the data from scratch.
Demographic Data requires grantees to provide data on students served and ethnicity/racial background.
All questions in this section are required and must be answered by all grantees EXCEPT the following:
Section 4, Question 2: This question does not apply to Partnership grantees, therefore they do not have to answer, and will not see this question

Student Outcomes requires grantees to provide data on cumulative course completion, graduation rates, FAFSA completion, and postsecondary enrollment.
All questions in this section are required and must be answered by all grantees EXCEPT the following:
Section 5, Question 5: The first four rows in this table are optional for all grantees
Section 5, Question 7: This question is optional for all grantees
Section 5, Question 8: This question is optional for all grantees
Section 5, Question 13: This question is optional for all grantees
Section 5, Question 14: This question is for State grantees only; Partnership grantees will not see it
Section 5, Question 15: This question is for State grantees only; Partnership grantees will not see it
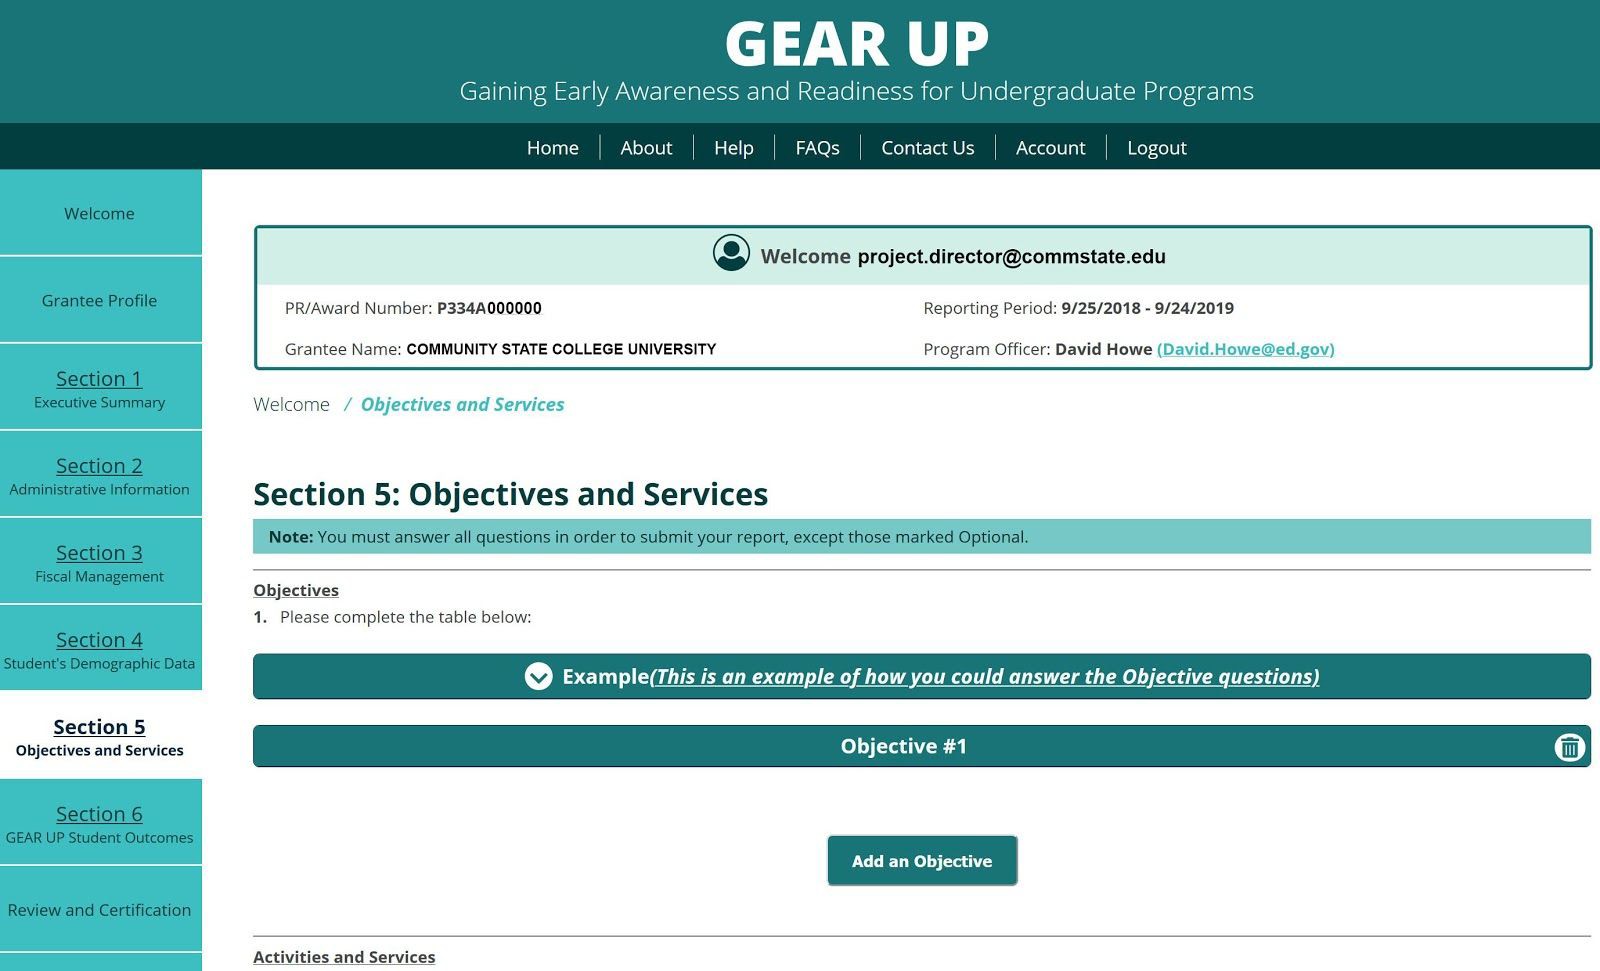
Section V, Question 1: Objectives
In question 1 you will be asked to create a list of approved Objectives from your grant application and/or approved modified objectives, and provide baseline data where applicable. To get started, click the Add an Objective button.
![]()
Then click the Objective header bar to expand the panel so you can enter your data.
![]()
Then enter your data into all the fields as displayed below.

To add another Objective, click the Add an Objective button again, and repeat until you’ve created records for all necessary objectives.
You can click any Objective header bar at any time to collapse it and get it out of your way, or to expand it so you can see the data inside it. The header bar is where it says “Objective #1” or #2, etc.
To delete an objective, simply click the Trash Can icon in the upper right corner of that objective’s header bar at any time. Be careful, because there is no undelete feature. If you delete an objective you didn’t mean to, you will have to re-enter the data from scratch.
Section V, Question 10: Target Schools Served
In question 10 you will be asked to create a list of schools participating in your GEAR UP project. To get started, click the Add a School button.
![]()
Then enter your data into all the fields as displayed below.

Click Save when done.
To add another School, click the Add a School button again, and repeat until you’ve created records for all necessary schools.
To delete a school, simply click the Trash Can icon in the upper right corner of that school’s header bar at any time. Be careful, because there is no undelete feature. If you delete a school you didn’t mean to, you will have to re-enter the data from scratch.
Section V, Question 11: Public Housing Projects Served
In question 11 you will be asked to create a list of housing projects served by your GEAR UP project. To get started, click the Add a Public Housing button.
![]()
Then enter your data into all the fields as displayed below.

Click Save when done.
To add another School, click the Add a Public Housing button again, and repeat until you’ve created records for all necessary housing.
To delete an entry, simply click the Trash Can icon in the upper right corner of that item’s header bar at any time. Be careful, because there is no undelete feature. If you delete an item you didn’t mean to, you will have to re-enter the data from scratch.
Section V, Question 13: Professional Development Activities Provided to Educators
In question 13 you will be asked to create a list of activities provided to educators as part of your approved project design. To get started, click the Add an Activity button.
![]()
Then enter your data into all the fields as displayed below.

To add another Activity, click the Add an Activity button again, and repeat until you’ve created records for all necessary activities.
To delete an activity, simply click the Trash Can icon on the right side of that item in the table at any time. Be careful, because there is no undelete feature. If you delete an activity you didn’t mean to, you will have to re-enter the data from scratch.
Section V, Question 15: State-wide Initiatives
(State Grantees Only) In question 13 you will be asked to create a list of state-wide initiatives implemented . To get started, click the Add an Initiative button.
![]()
Then enter your data into all the fields as displayed below.

To add another Initiative, click the Add an Initiative button again, and repeat until you’ve created records for all necessary initiatives.
To delete an initiative, simply click the Trash Can icon on the right side of that item in the table at any time. Be careful, because there is no undelete feature. If you delete an initiative you didn’t mean to, you will have to re-enter the data from scratch.
Grant Budget requires grantees to provide data on actual Federal expenditures and actual matching contributions in a variety of budget categories over the life of the grant.
All questions in this section are required and must be answered by all grantees EXCEPT the following:
Section 6, Question 1: First Year grantees do not have to answer, and will not see this question
Section 6, Question 2: First Year grantees do not have to answer, and will not see this question
Section 6, Question 3: This question is optional for all grantees
Section 6, Question 4, Column 1:
First Year grantees do not have to answer, and will not see this column
This column is optional for all other grantees
Section 6, Question 4, Column 2:
First Year grantees do not have to answer, and will not see this column
This column is optional for all other grantees
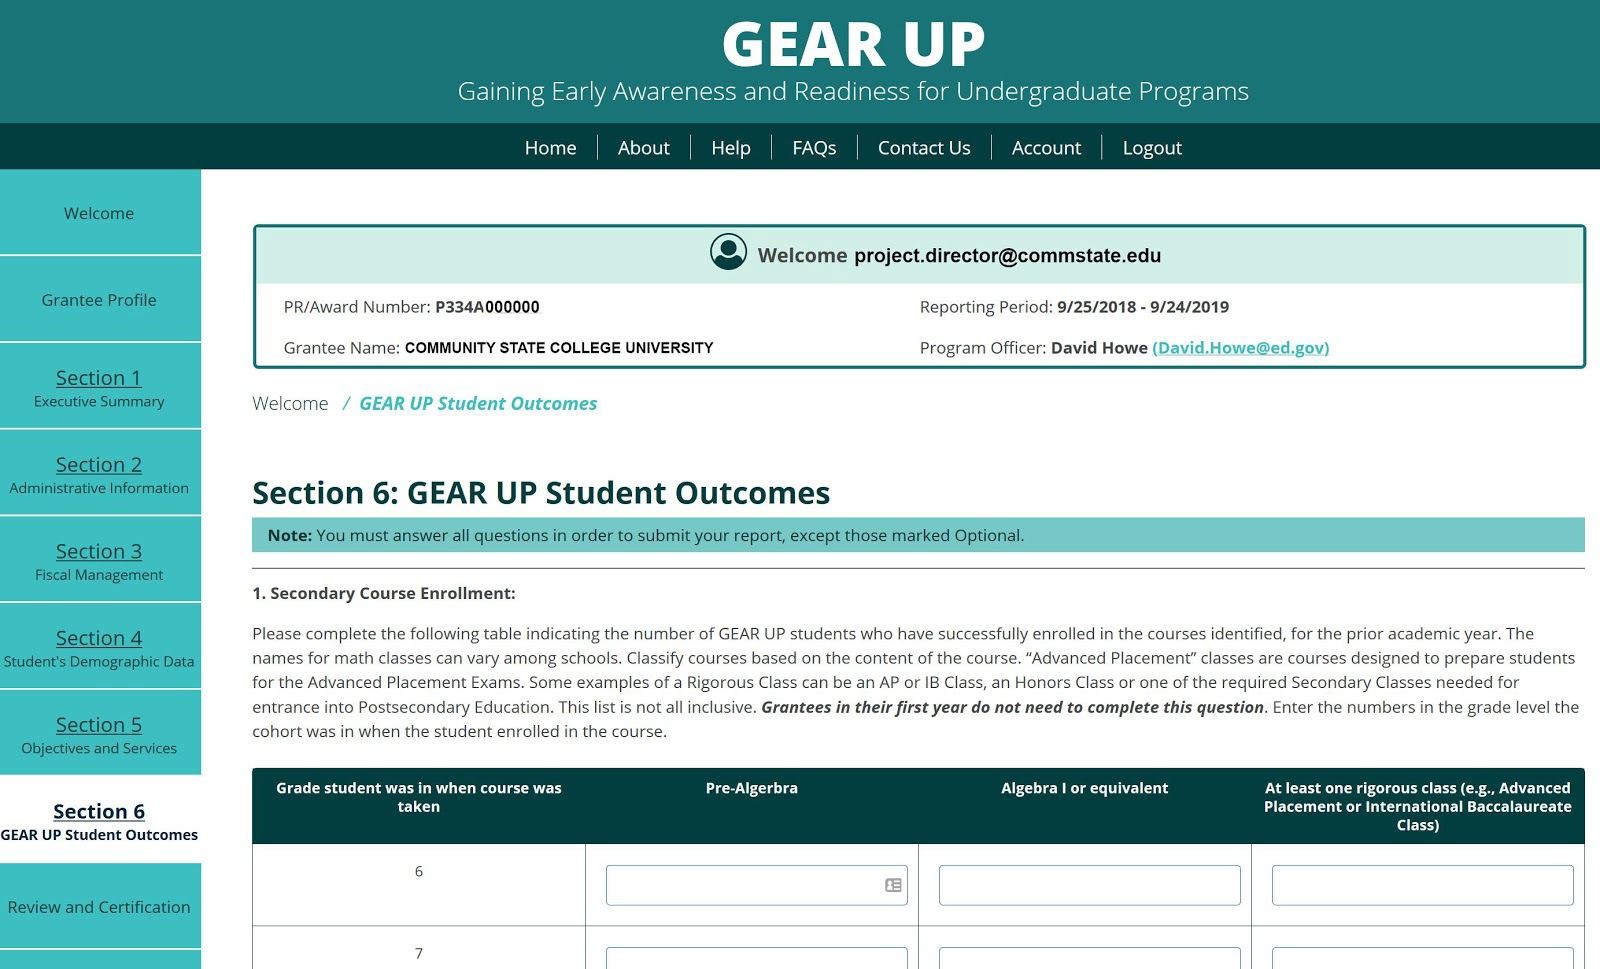
The Review and Certification page consists of three tabs: Review, Certification, and Submit.
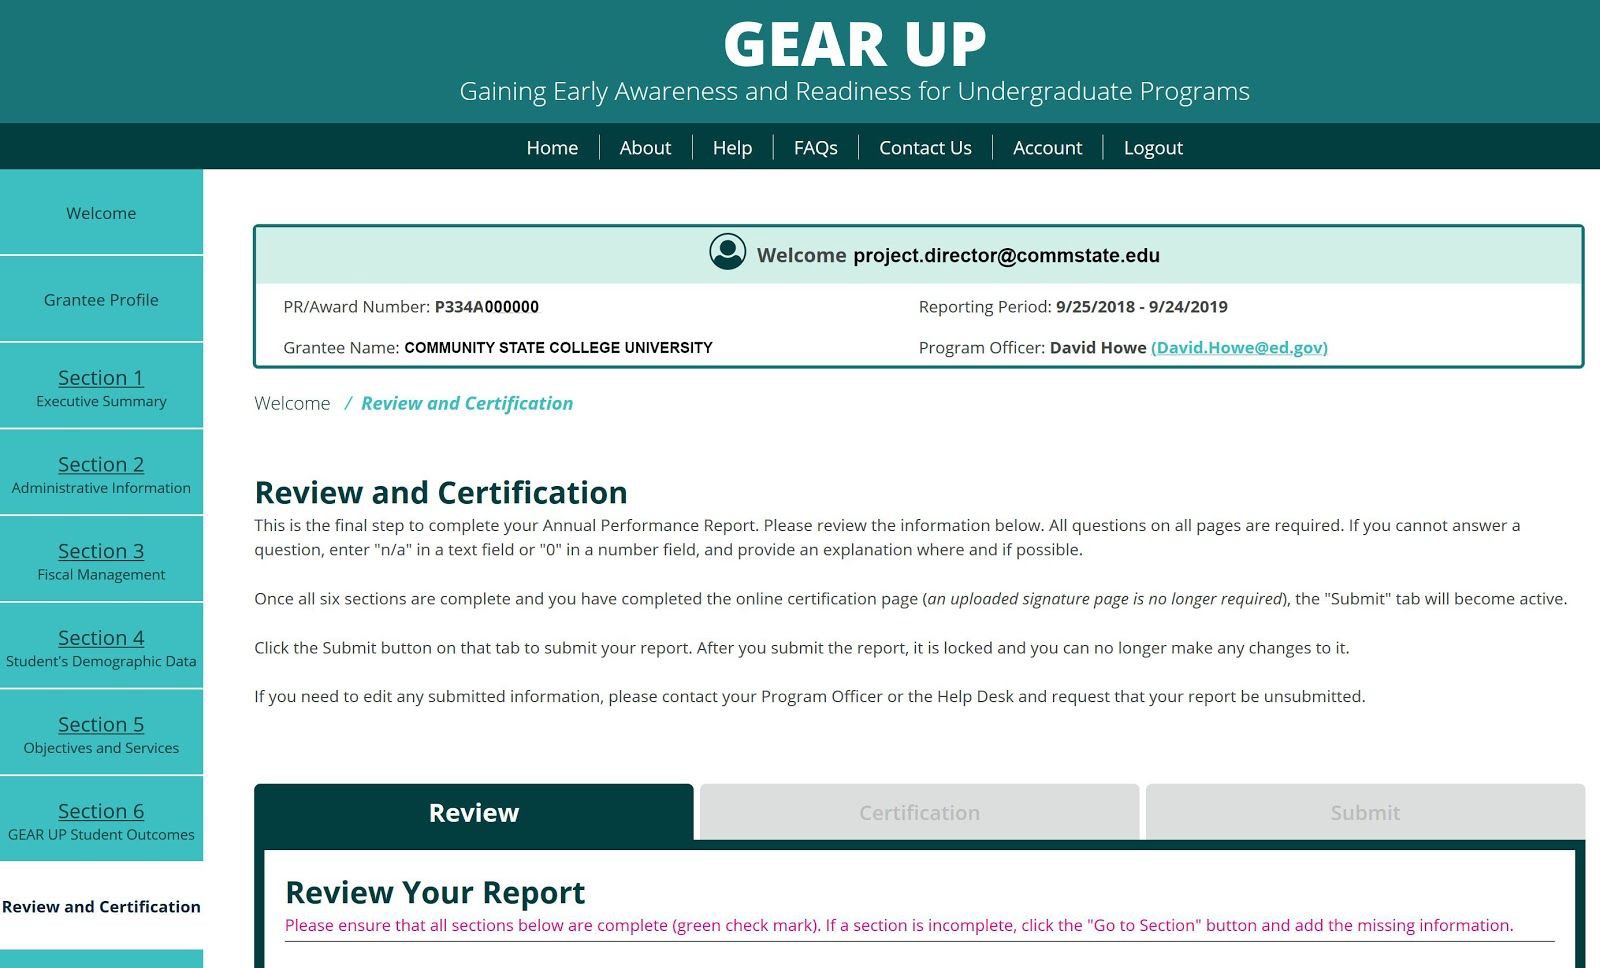
The Review tab performs a check, making sure that all fields are complete prior to submission. Please note that ALL FIELDS are required. If a question does not apply to your grant or if you have no data to supply, please enter “n/a” or “not applicable” in text fields, and a zero in number fields.


The GEAR UP system no longer requires you to upload a signed PDF version of the Certification Form. Now your Certifying Official need only log in and enter their name, email address, phone number, and date.
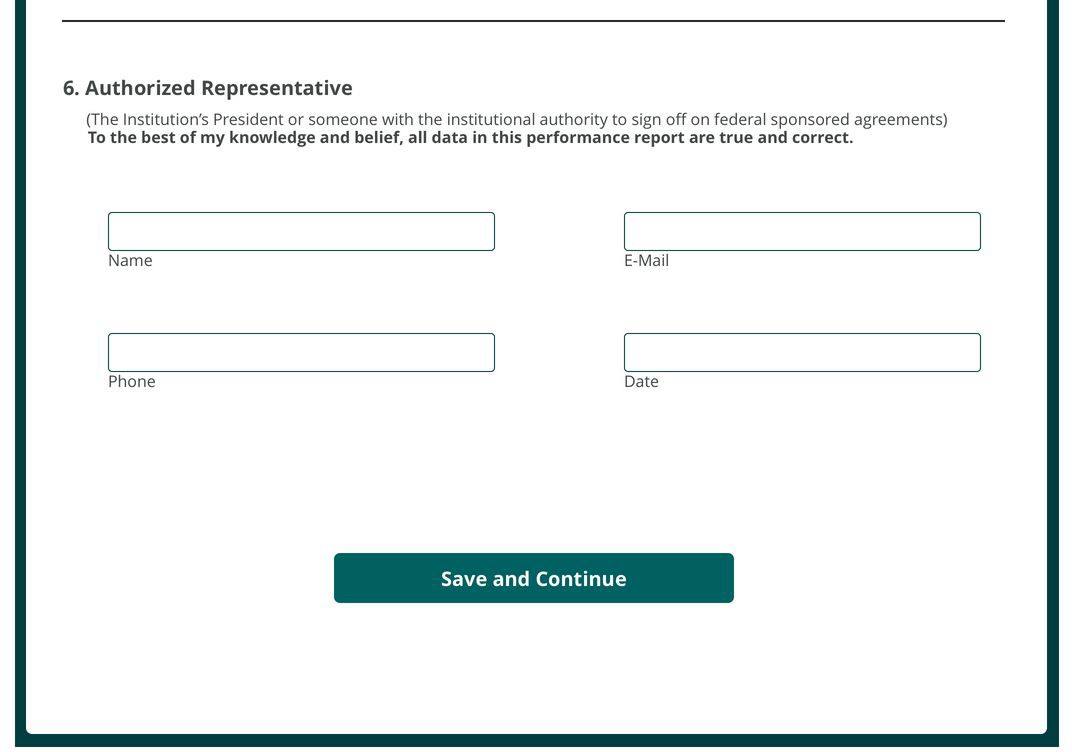
Go to the Review and Certification page and click on the Certification tab.
Verify that the information about your grant and institution are correct. If you need to make changes, click the button or go to the Grant Profile page.
The Certifying Official should enter their name email address, phone number, and date on this tab. By completing these fields and saving the page, they are certifying that all data in the performance report are true and correct to the best of their knowledge.
Click the Save and Continue button when done.
When all required data has been entered and your Certification page has been completed, the Submit tab will become available. The Submit tab will not be available until the system determines that your report is finished.

When ready to submit your report, click the Submit button.
Once the report is submitted, it is locked and cannot be edited. If you need to make changes, contact your Program Officer or the Help Desk before the report deadline and request that your report be unsubmitted so you can make edits.
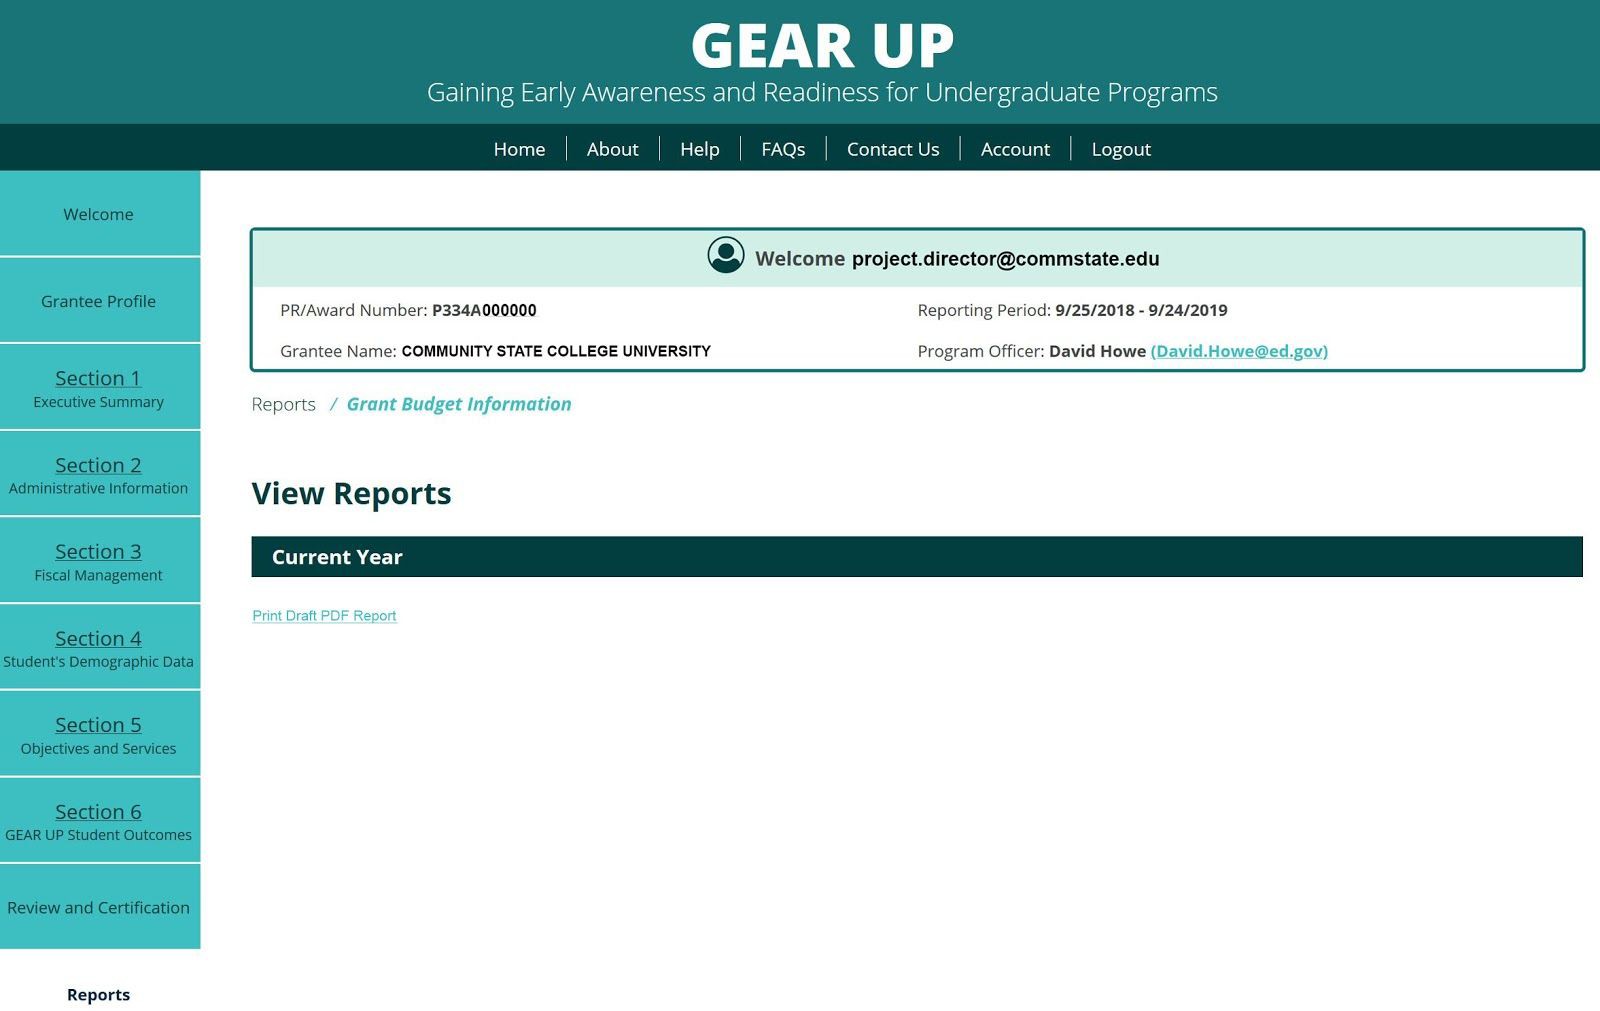
To download a copy of your current year’s report in PDF format, click the Reports tab.
| File Type | application/vnd.openxmlformats-officedocument.wordprocessingml.document |
| Author | Kennedy, Lauren |
| File Modified | 0000-00-00 |
| File Created | 2022-04-26 |
© 2026 OMB.report | Privacy Policy